DENTAL TREATMENT ROOM – DESIGN GUIDE
For you, who prioritize working with high productivity without health compromises, it is important to follow few simple rules when designing your treatment room. Key to the optimal design is the relative location of your unit & patient chair, hand instrument table and worktop. In cooperation with leading dentists, XO CARE developed the following guidelines that will help you improve your working environment. This solution suits three distinct working paradigms:
- DUO – four-handed work
- SOLO – two-handed work
- DUO-SOLO – alternating four- and two-handed work
You and your assistant will maintain a healthy working posture, while still having easy access to everything you need – without leaving the patient for a single moment.
FUNDAMENTAL TREATMENT ROOM DESIGN GUIDELINES1
To gain maximum productivity in combination with healthy working posture it is important that the clinic design allows:
- You to work in all positions between 9 and 12 o’clock in order to see all surfaces of all teeth
- The dental assistant to reach materials etc. just by rotating the stool
- Both of you to have easy access to hand instruments
You do that by designing your treatment room as shown below.
The guidelines mentioned above in combination with a well-designed dental unit allow you to sit, see and work well – all at the same time.
SIT WELL
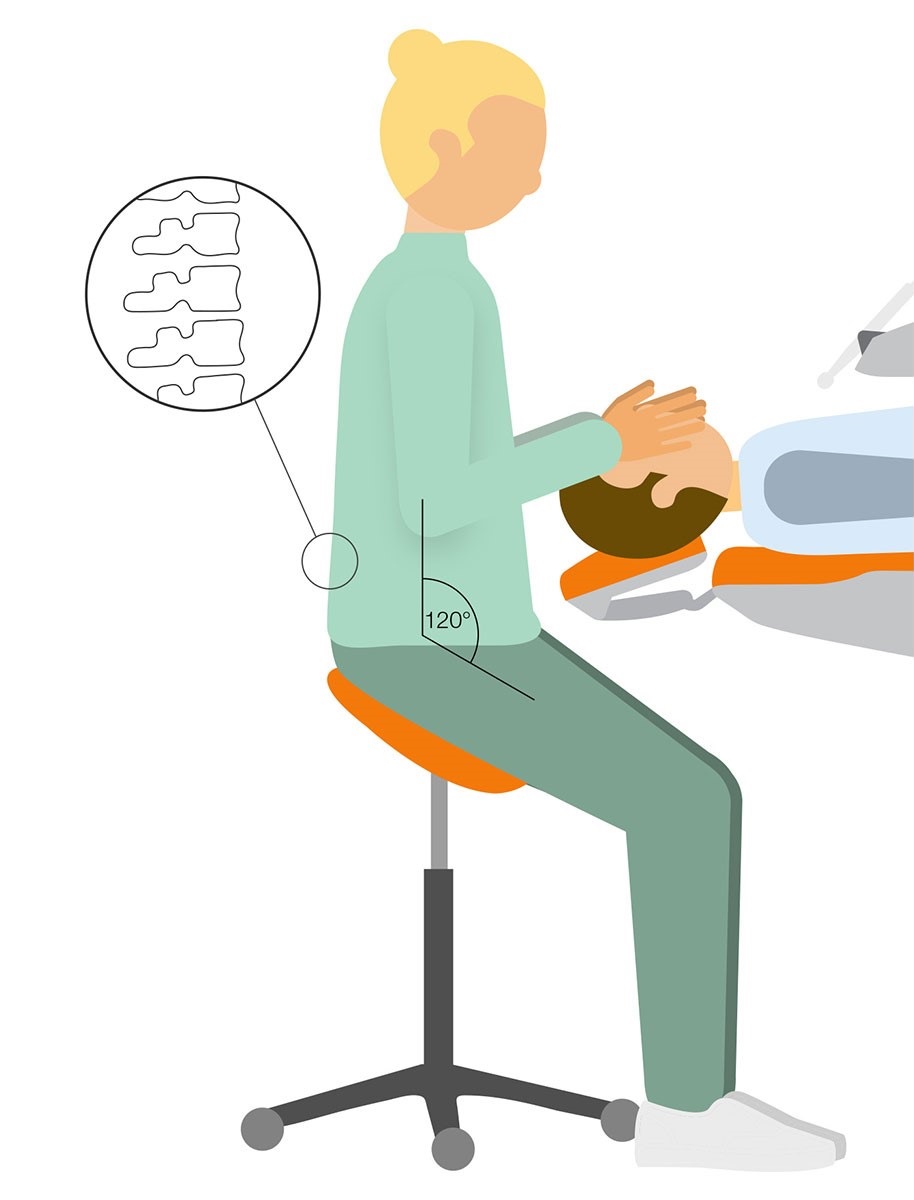
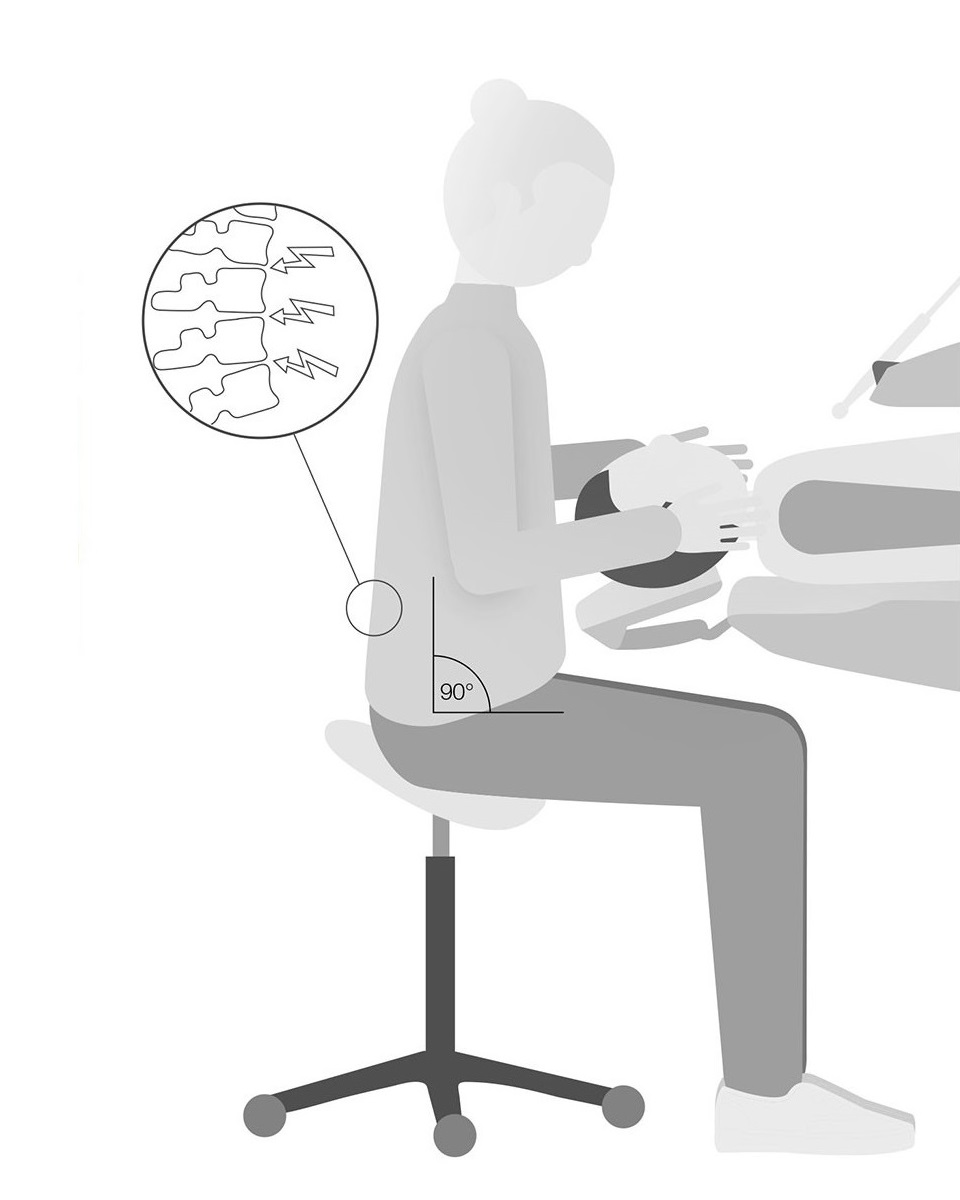
Mandal3 determined that the healthiest sitting position is what he called “the upright balanced position”, with an angle of around 120 degrees between thighs and upper body. In this position, the spine retains its natural curve preventing extended pressure on the intervertebral discs.
The dental assistant’s head should be at the same horizontal level as your head while working. If you are taller, the assistant may use a stool with a foot ring to increase their horizontal position.
Please note that the upright balanced sitting position requires a higher position of patient chair, hand instrument table and worktop than the traditional position with horizontal thighs!
SEE WELL
You are able to see all surfaces of all teeth – maintaining a balanced working position – when you combine all working positions between 9 and 12 o’clock with 6 different patient head positions: 3 for the upper jaw and 3 for the lower jaw5.
Note that especially the 12 o’clock position is important – meaning that the dental cabinet design must allow enough space for this.
WORK WELL
Studies suggest that working with an instrument bridge placed over the chest of patient is the best way of achieving a good balanced working position while seeing all surfaces of all teeth5.
Before and after the treatment, position the instrument bridge on the dental assistant's side of the unit. This reassures nervous patients, as they will see less of unit instruments when entering and leaving the chair. Further, it is easier for the dental assistant to prepare the unit and instruments for the next treatment.
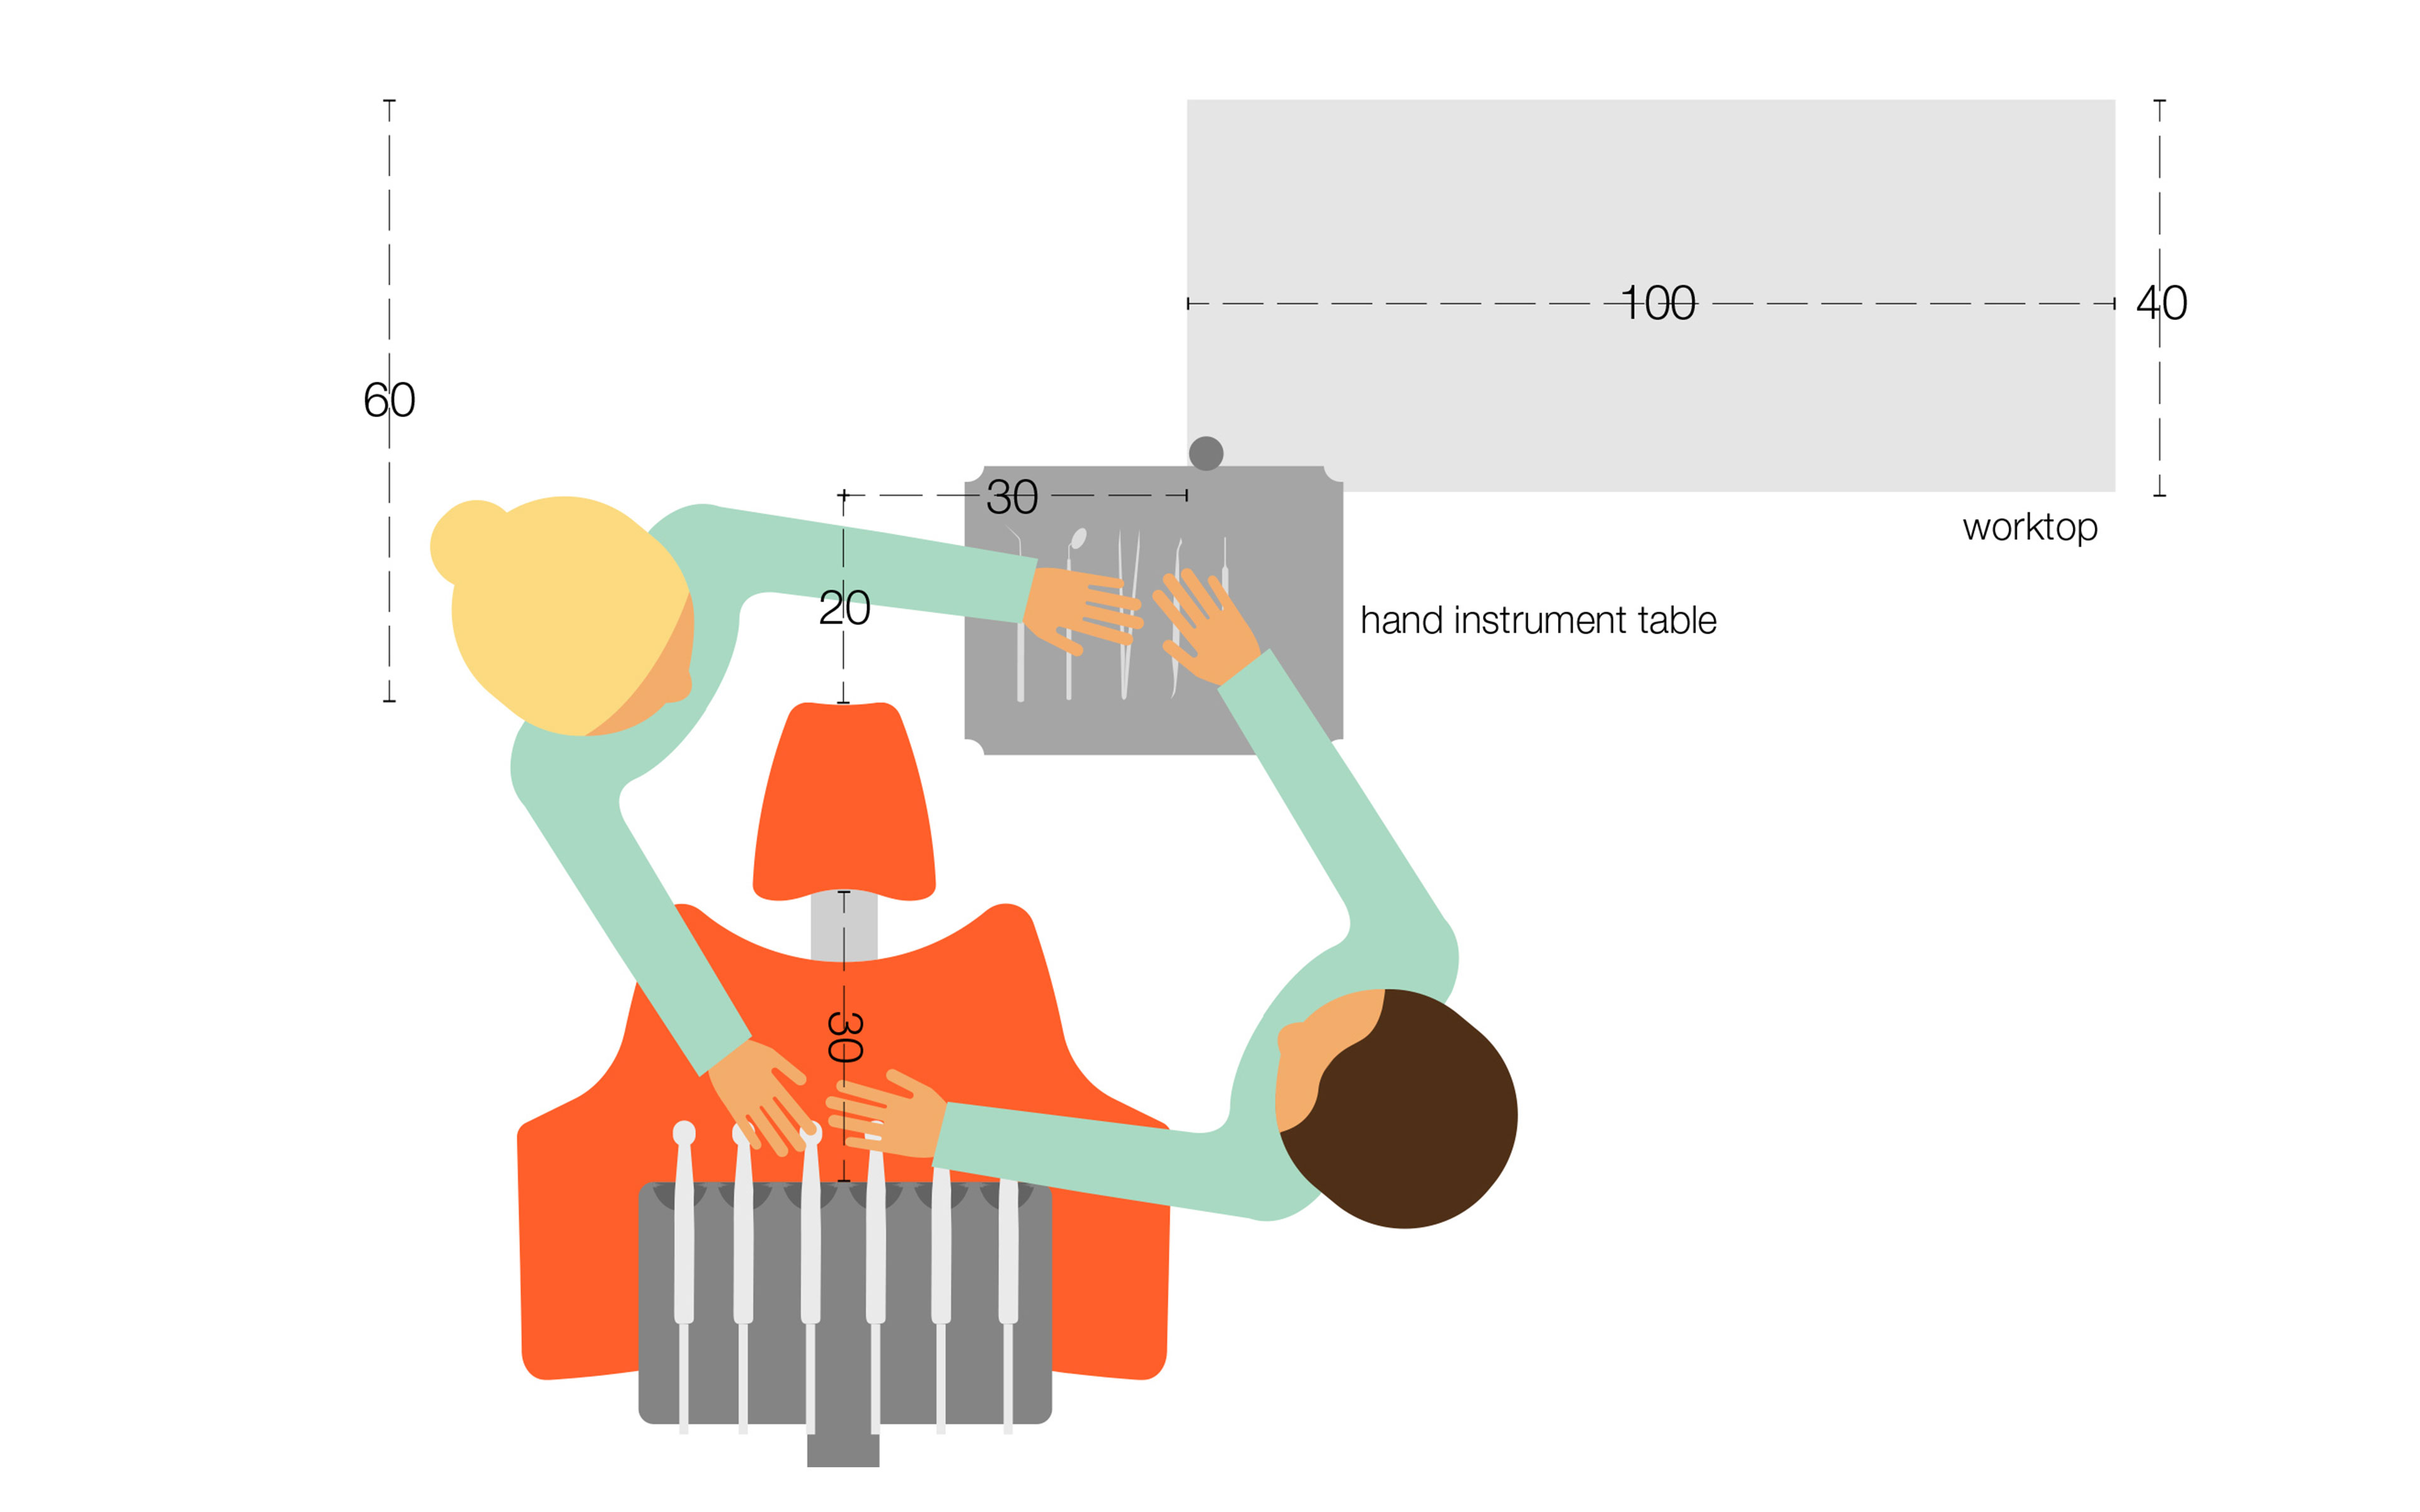
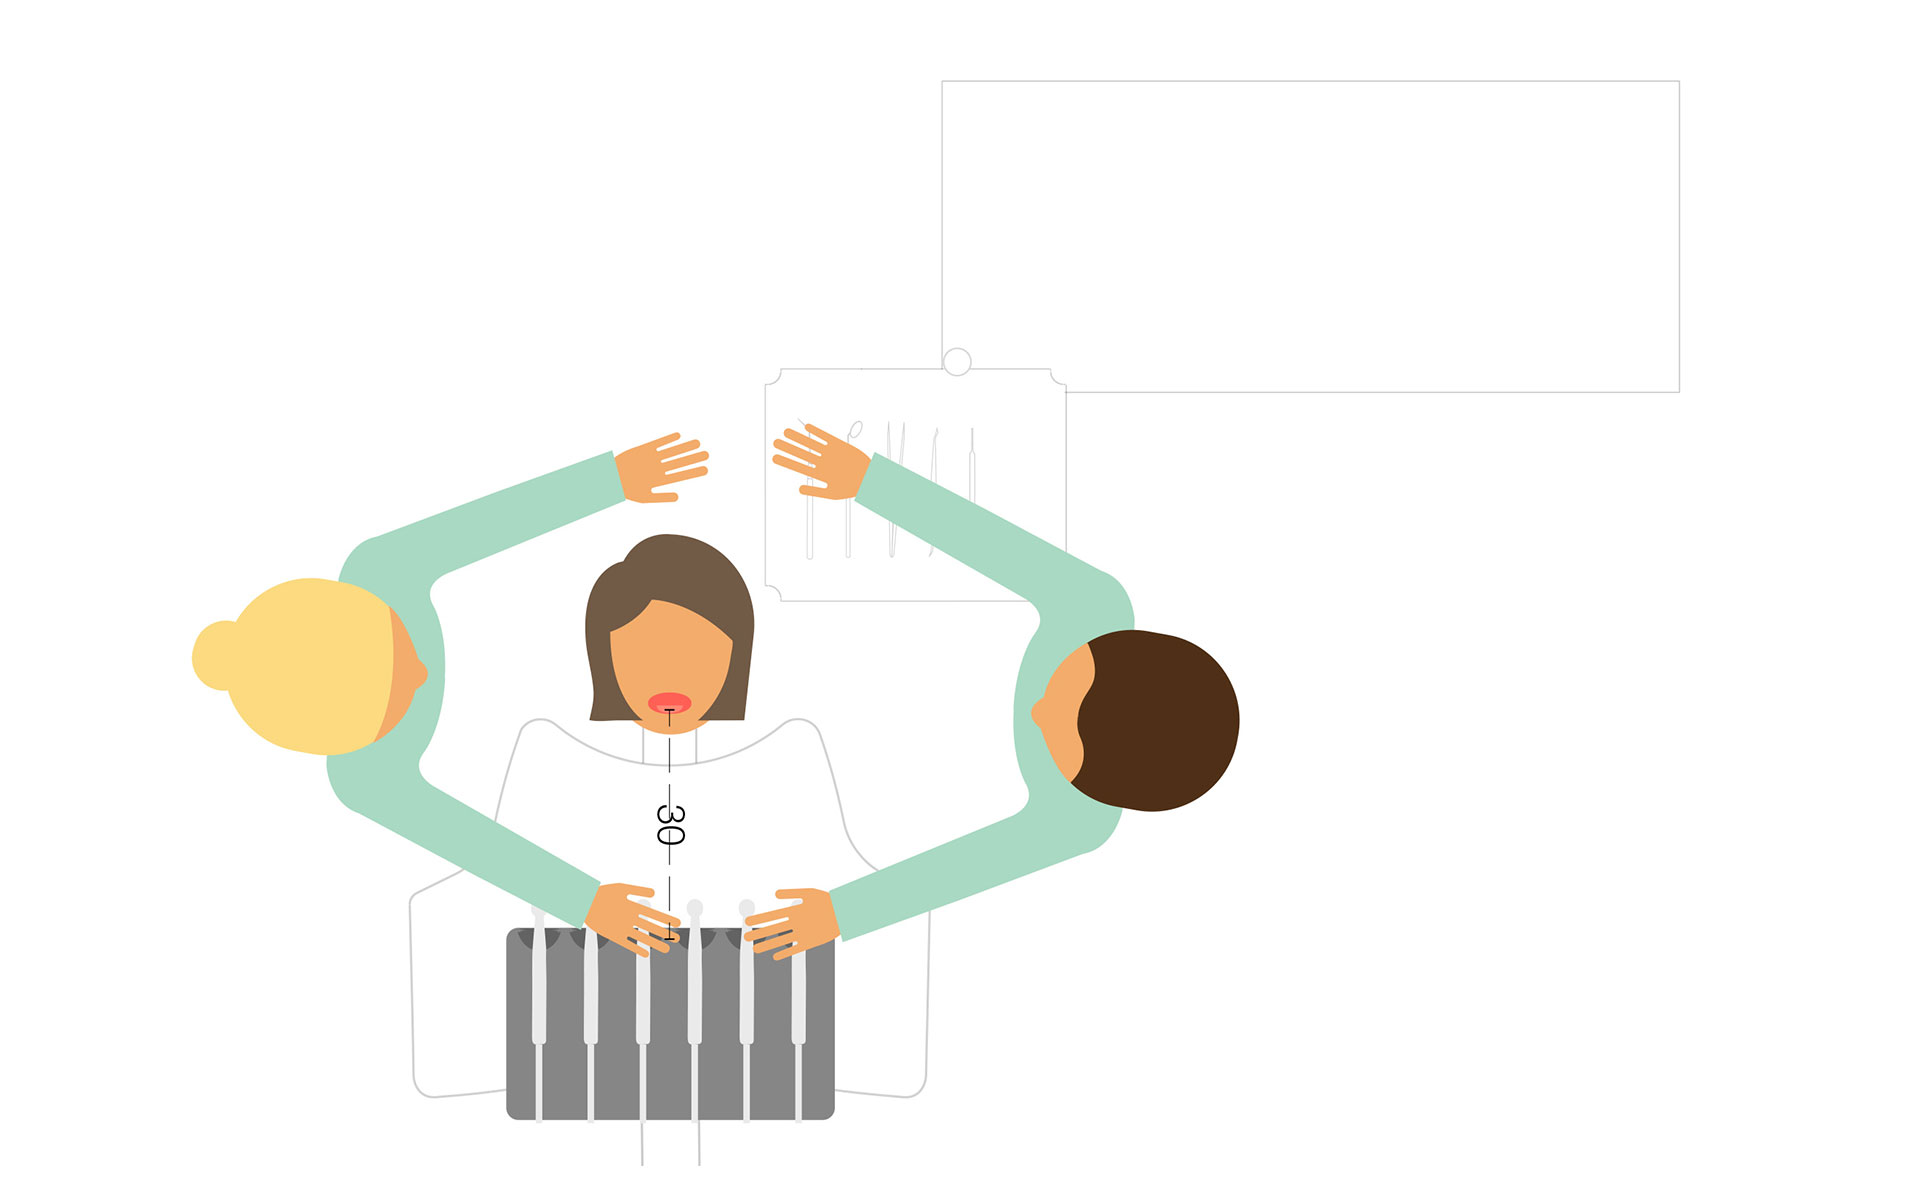
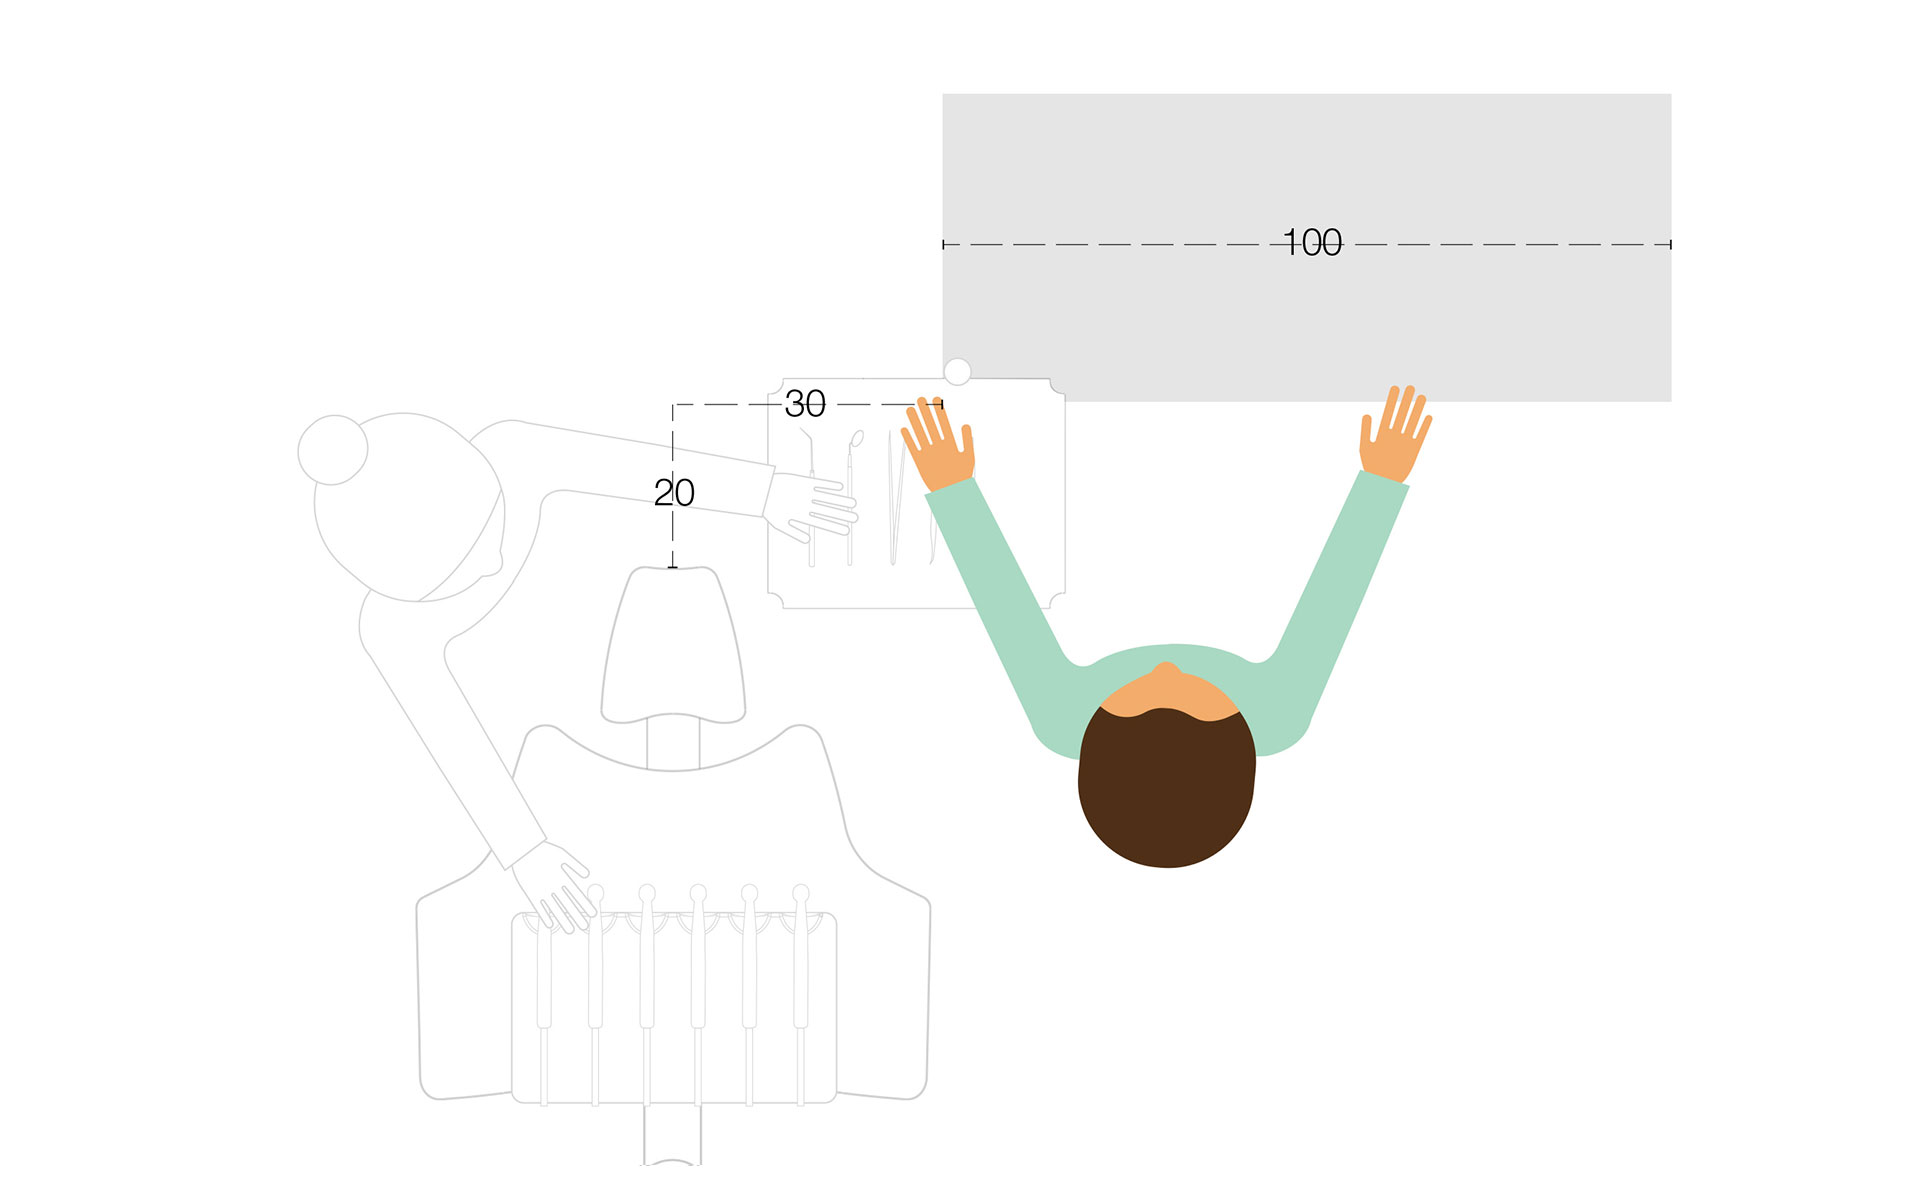
When the patient is in the chair, position the unit's instrument bridge above the chest of the patient, with a distance of 30 cm between the tips of the unit instruments and patient’s mouth. In this way, you and your assistant are able to reach the instruments in all working positions from 9 to 12 o’clock, without twisting the body and without looking away from the patient.
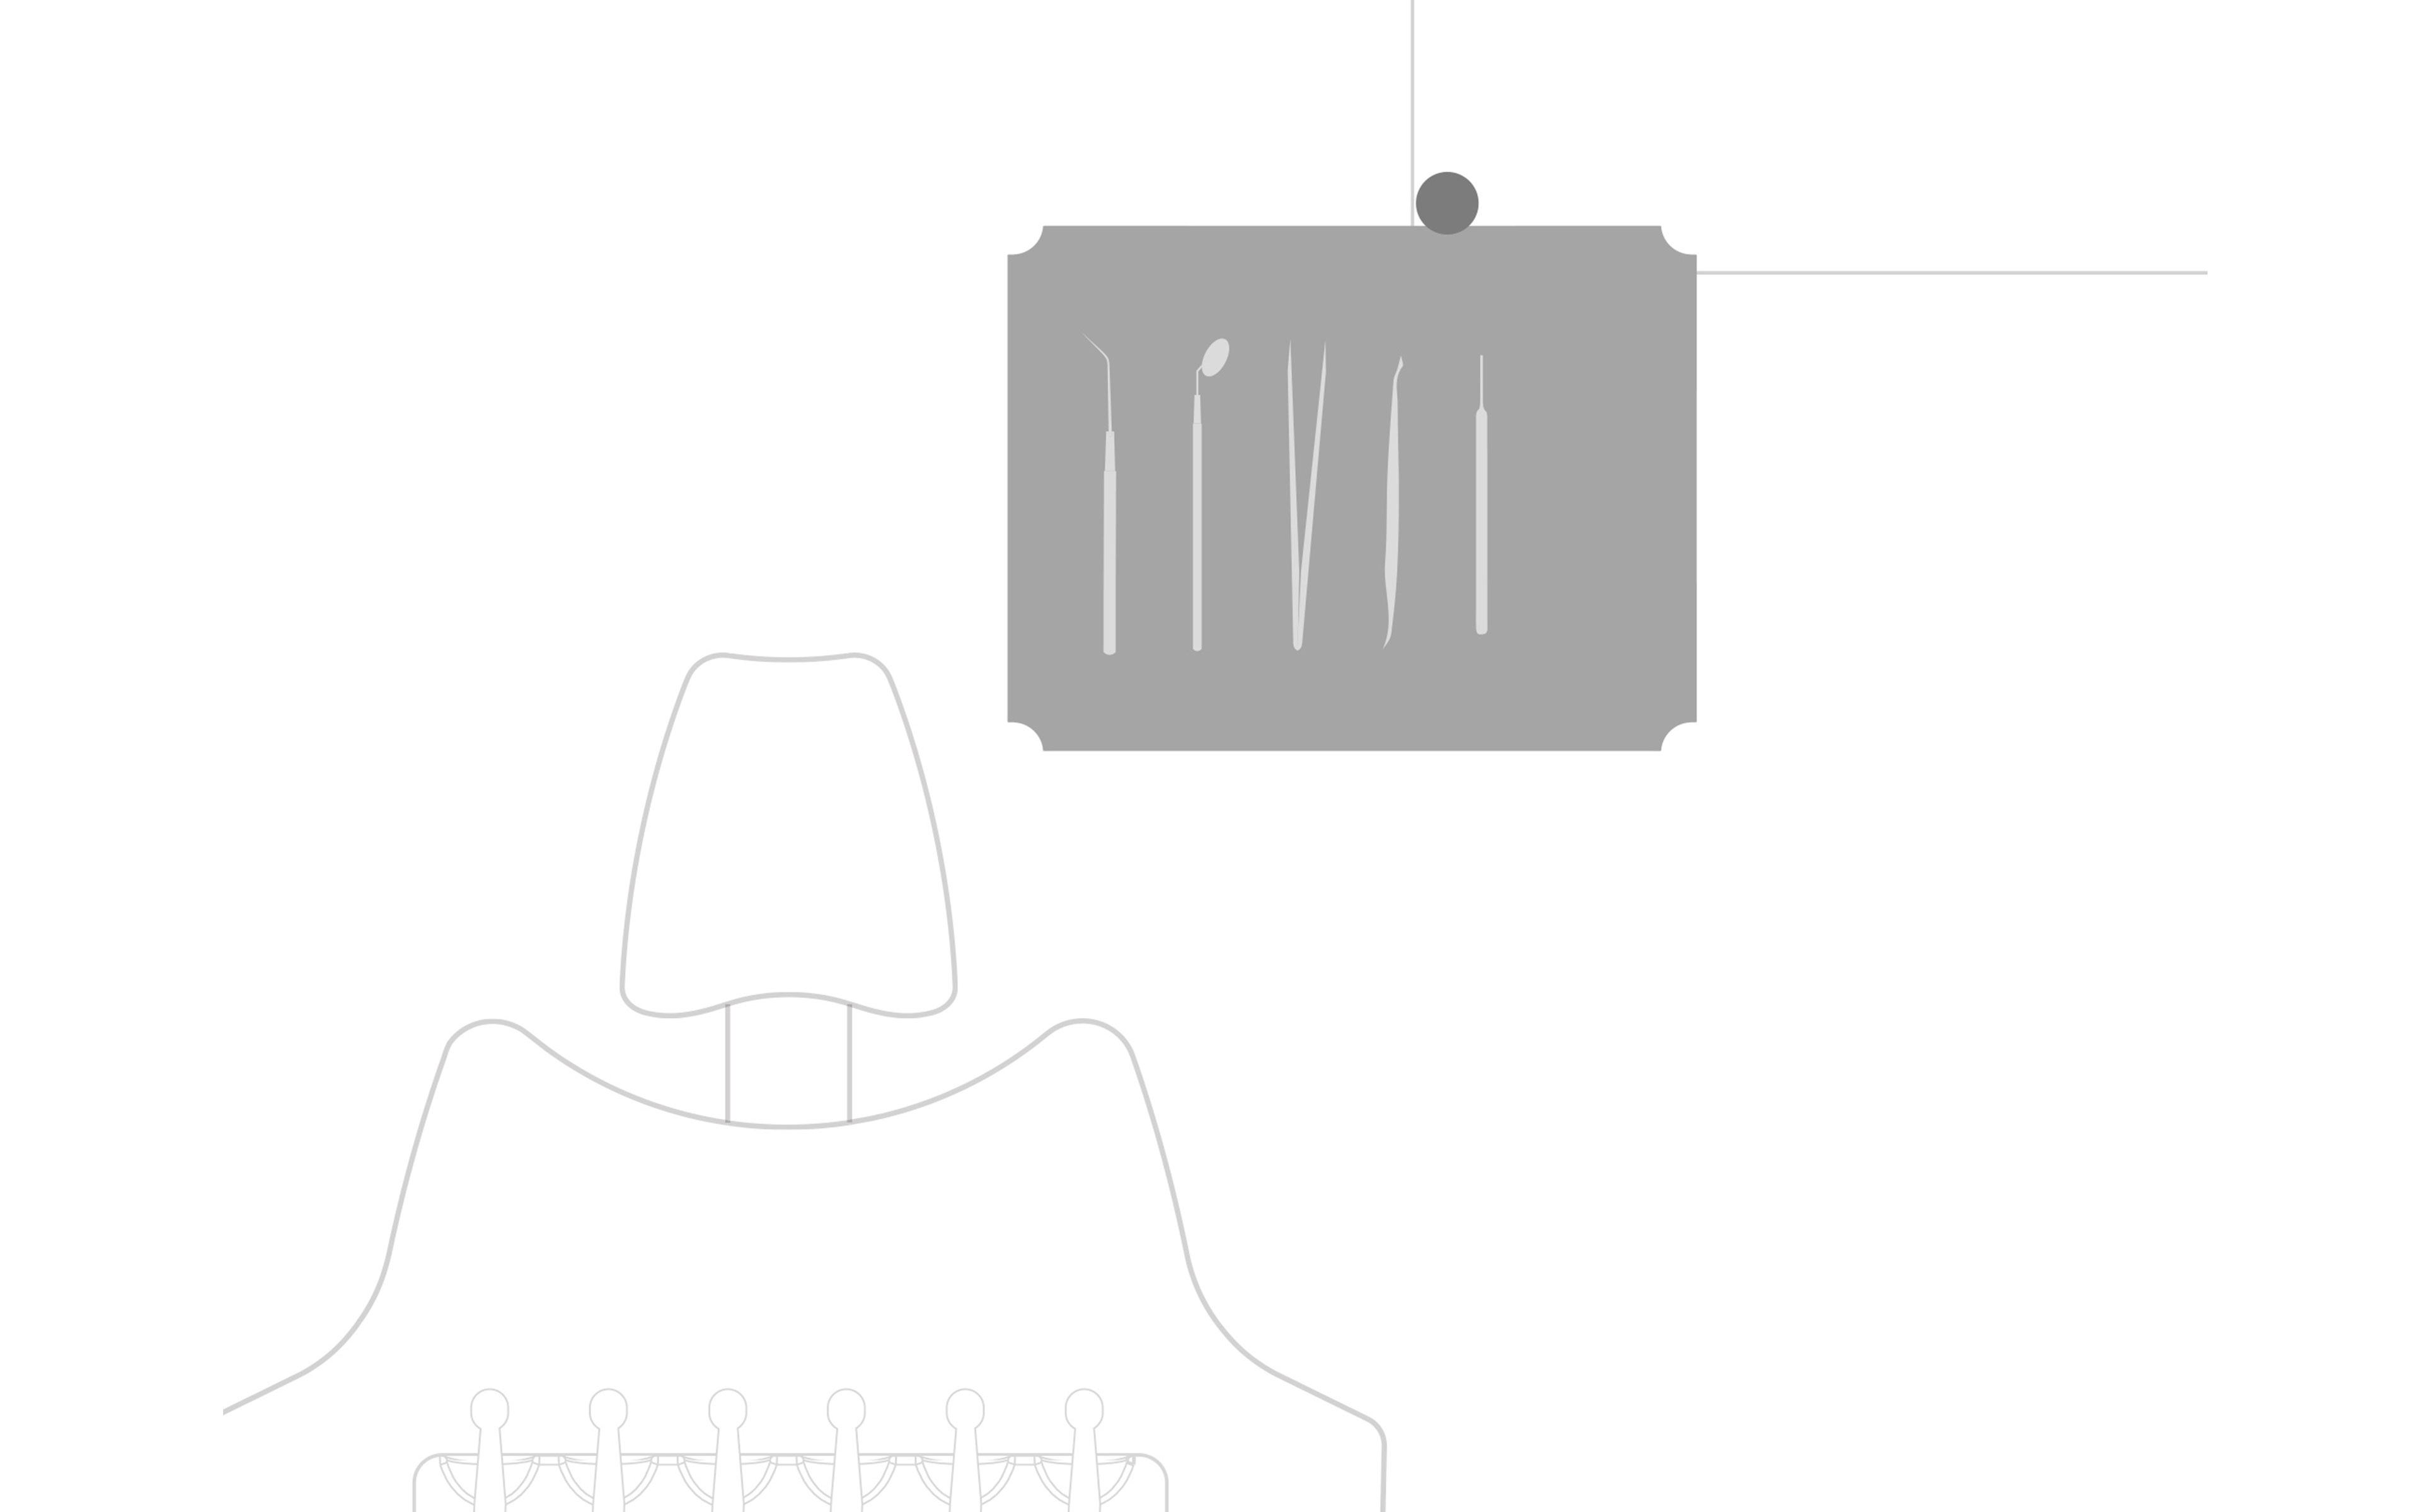
THE RIGHT PLACE FOR YOUR HAND INSTRUMENTS
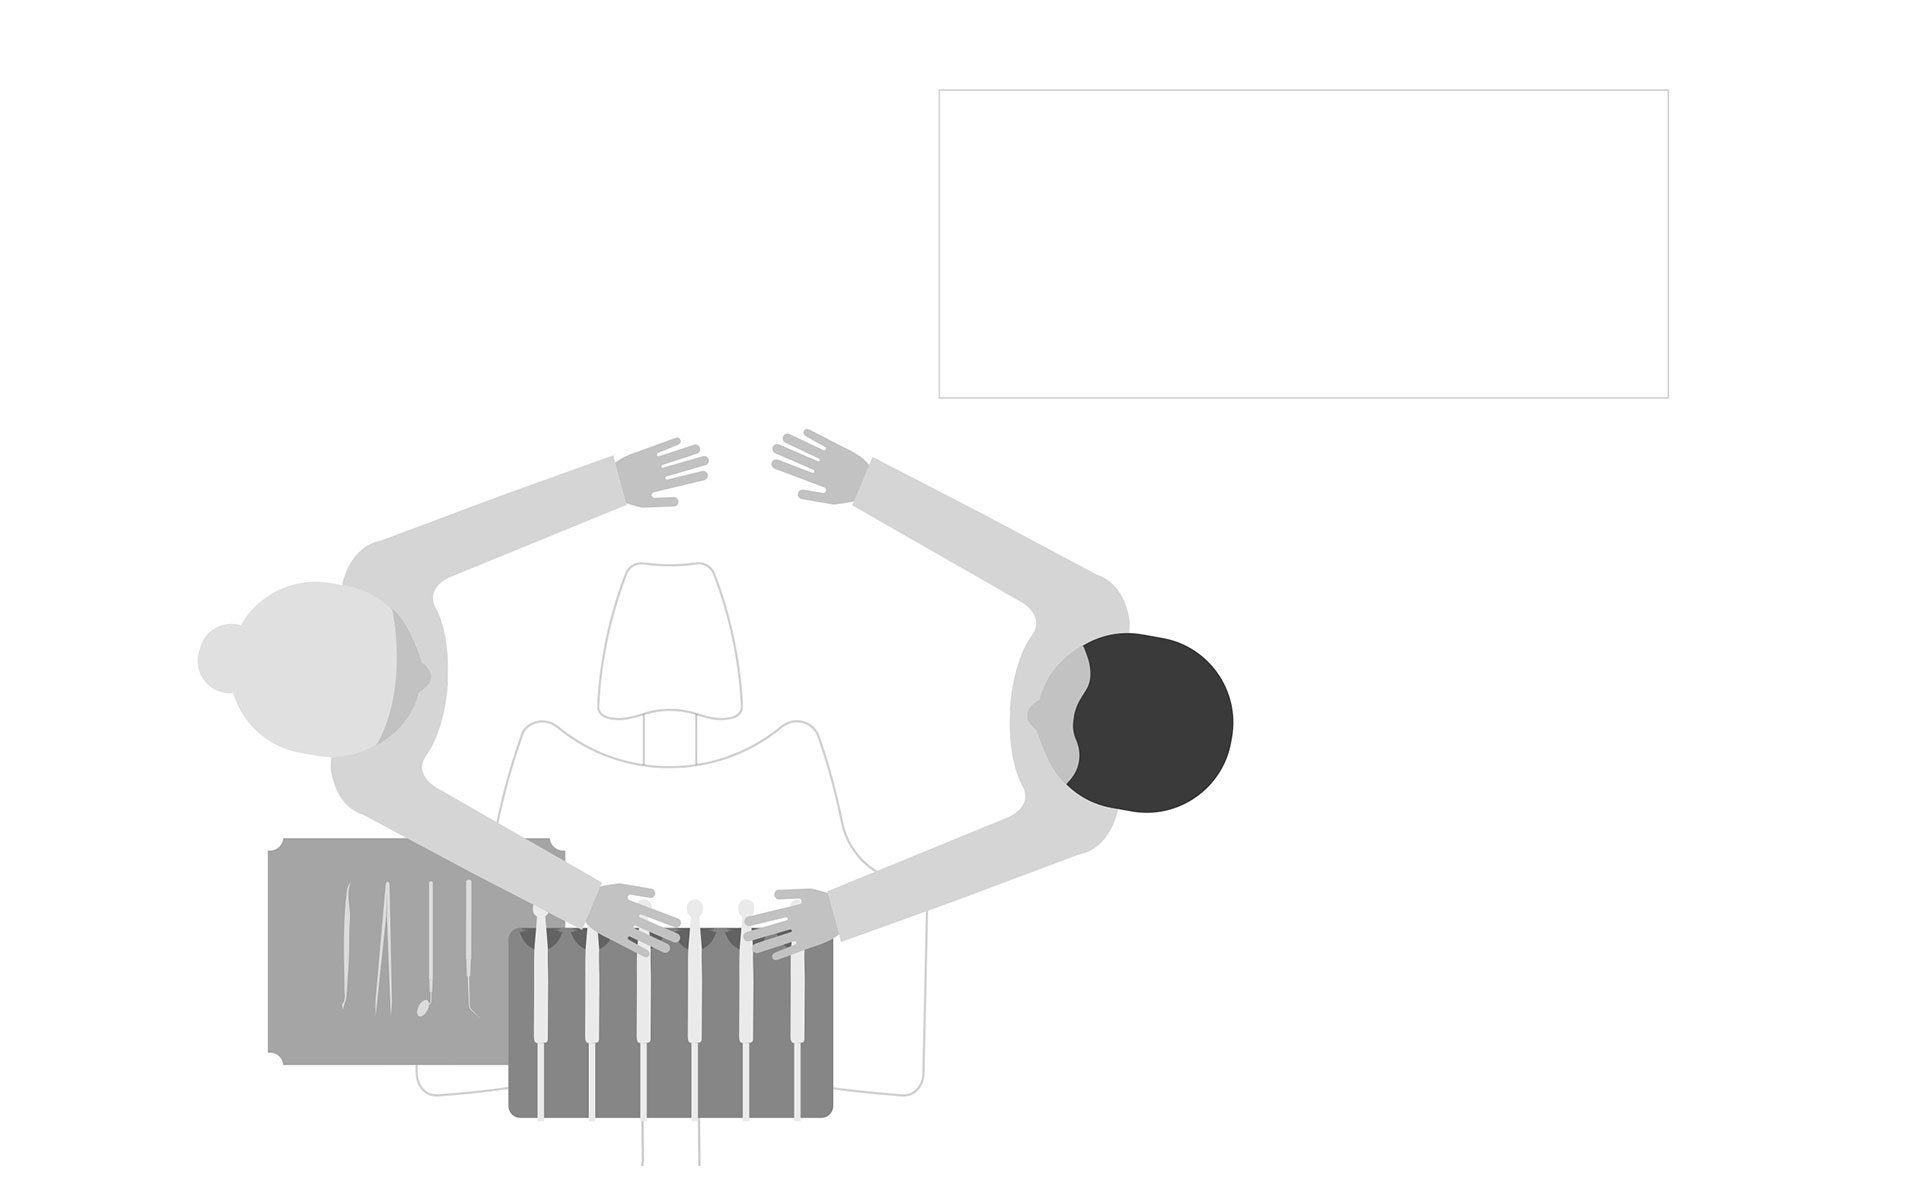
The traditional solution is to attach the hand instrument table to the side of the instrument bridge. Here, the access to the instruments is difficult for your assistant while you work in the 9 o’clock position – and for you if you work solo.
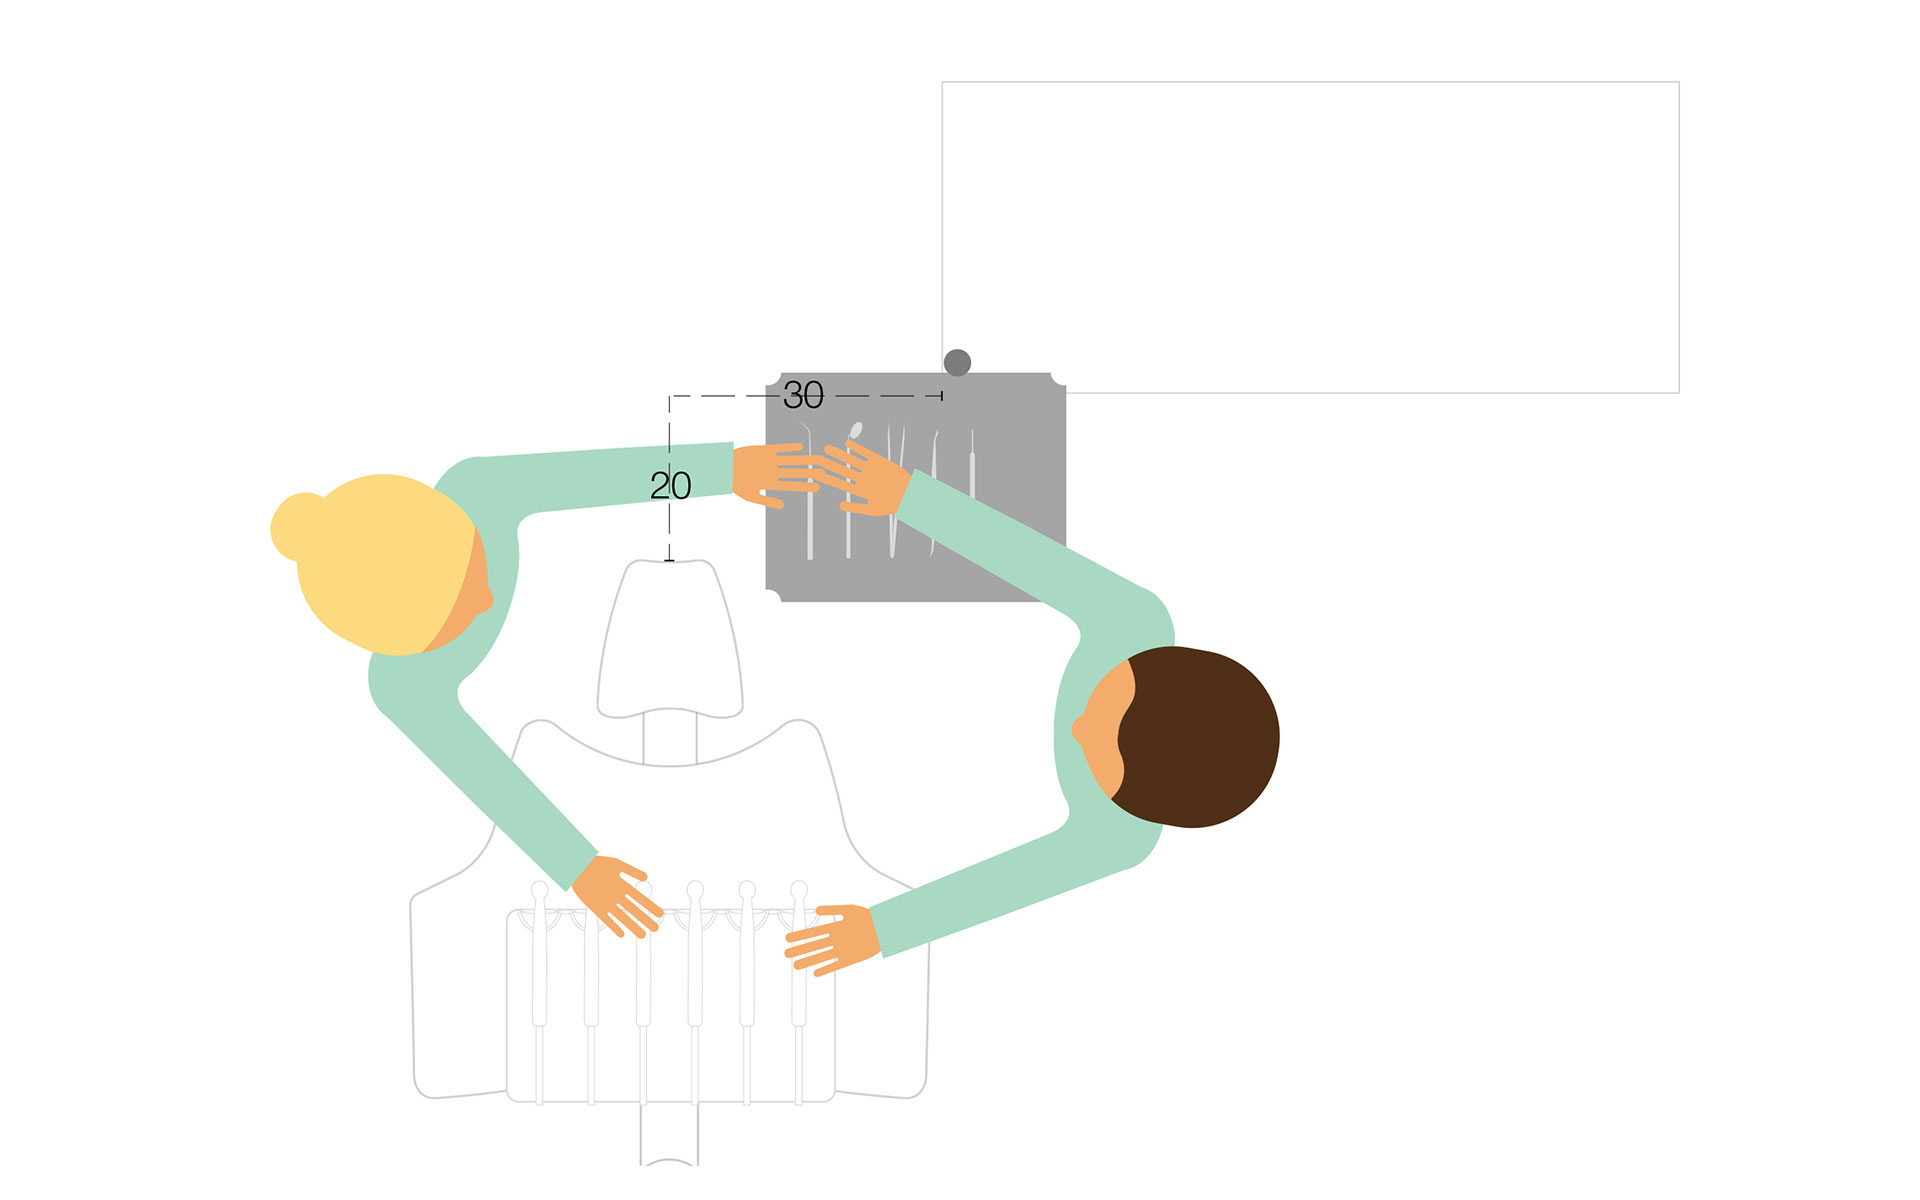
A much better solution is to place the hand instrument table near the patient’s temple. The dental assistant can then reach hand instruments using the right hand – or if holding the suction hose with the right hand, reach the instruments with the left hand crossing the right arm. You can even grab the instruments yourself using the left hand.
The hand instrument table holder should allow for rotation and movement to the sides.
A good solution is the XO Hand Instrument Table. It satisfies all of the above guidelines and fits the majority of dental cabinets. The table is easy to position, and it makes hand instruments delivery much more efficient while reducing health hazards.
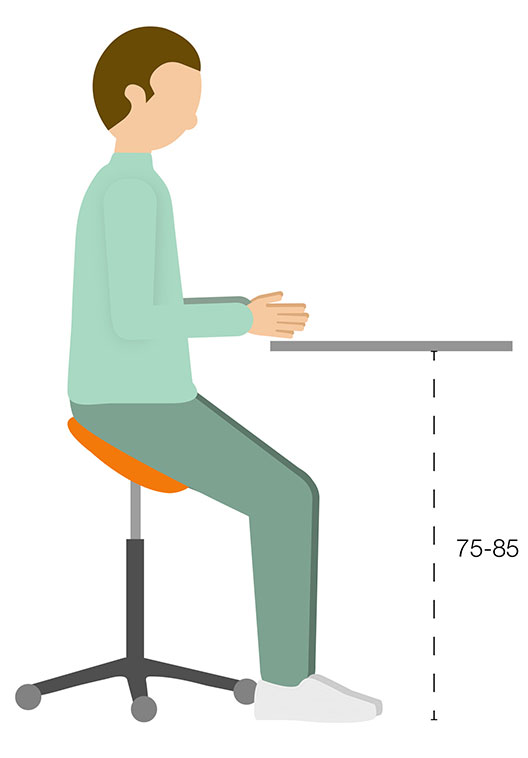
WORKTOP DESIGN REQUIREMENTS
In order to work safely and comfortably, the dental assistant needs a worktop at a height of 75 to 85 cm above the floor while sitting in the upright balanced position.
In order for the dental assistant to stay with the patient and reach materials just by rotating the stool, we recommend the following guidelines (right-handed dentist):
- The left side of the worktop should be 30 cm from the center axis of the patient's chair
- The distance from the neck rest to the edge of the worktop should be about 20 cm – this ensures that the dental assistant can reach the worktop by simply rotating on a stool
- The worktop should be at least 100 cm wide, creating enough space for materials etc.
THE DENTIST’S WORKING SPACE
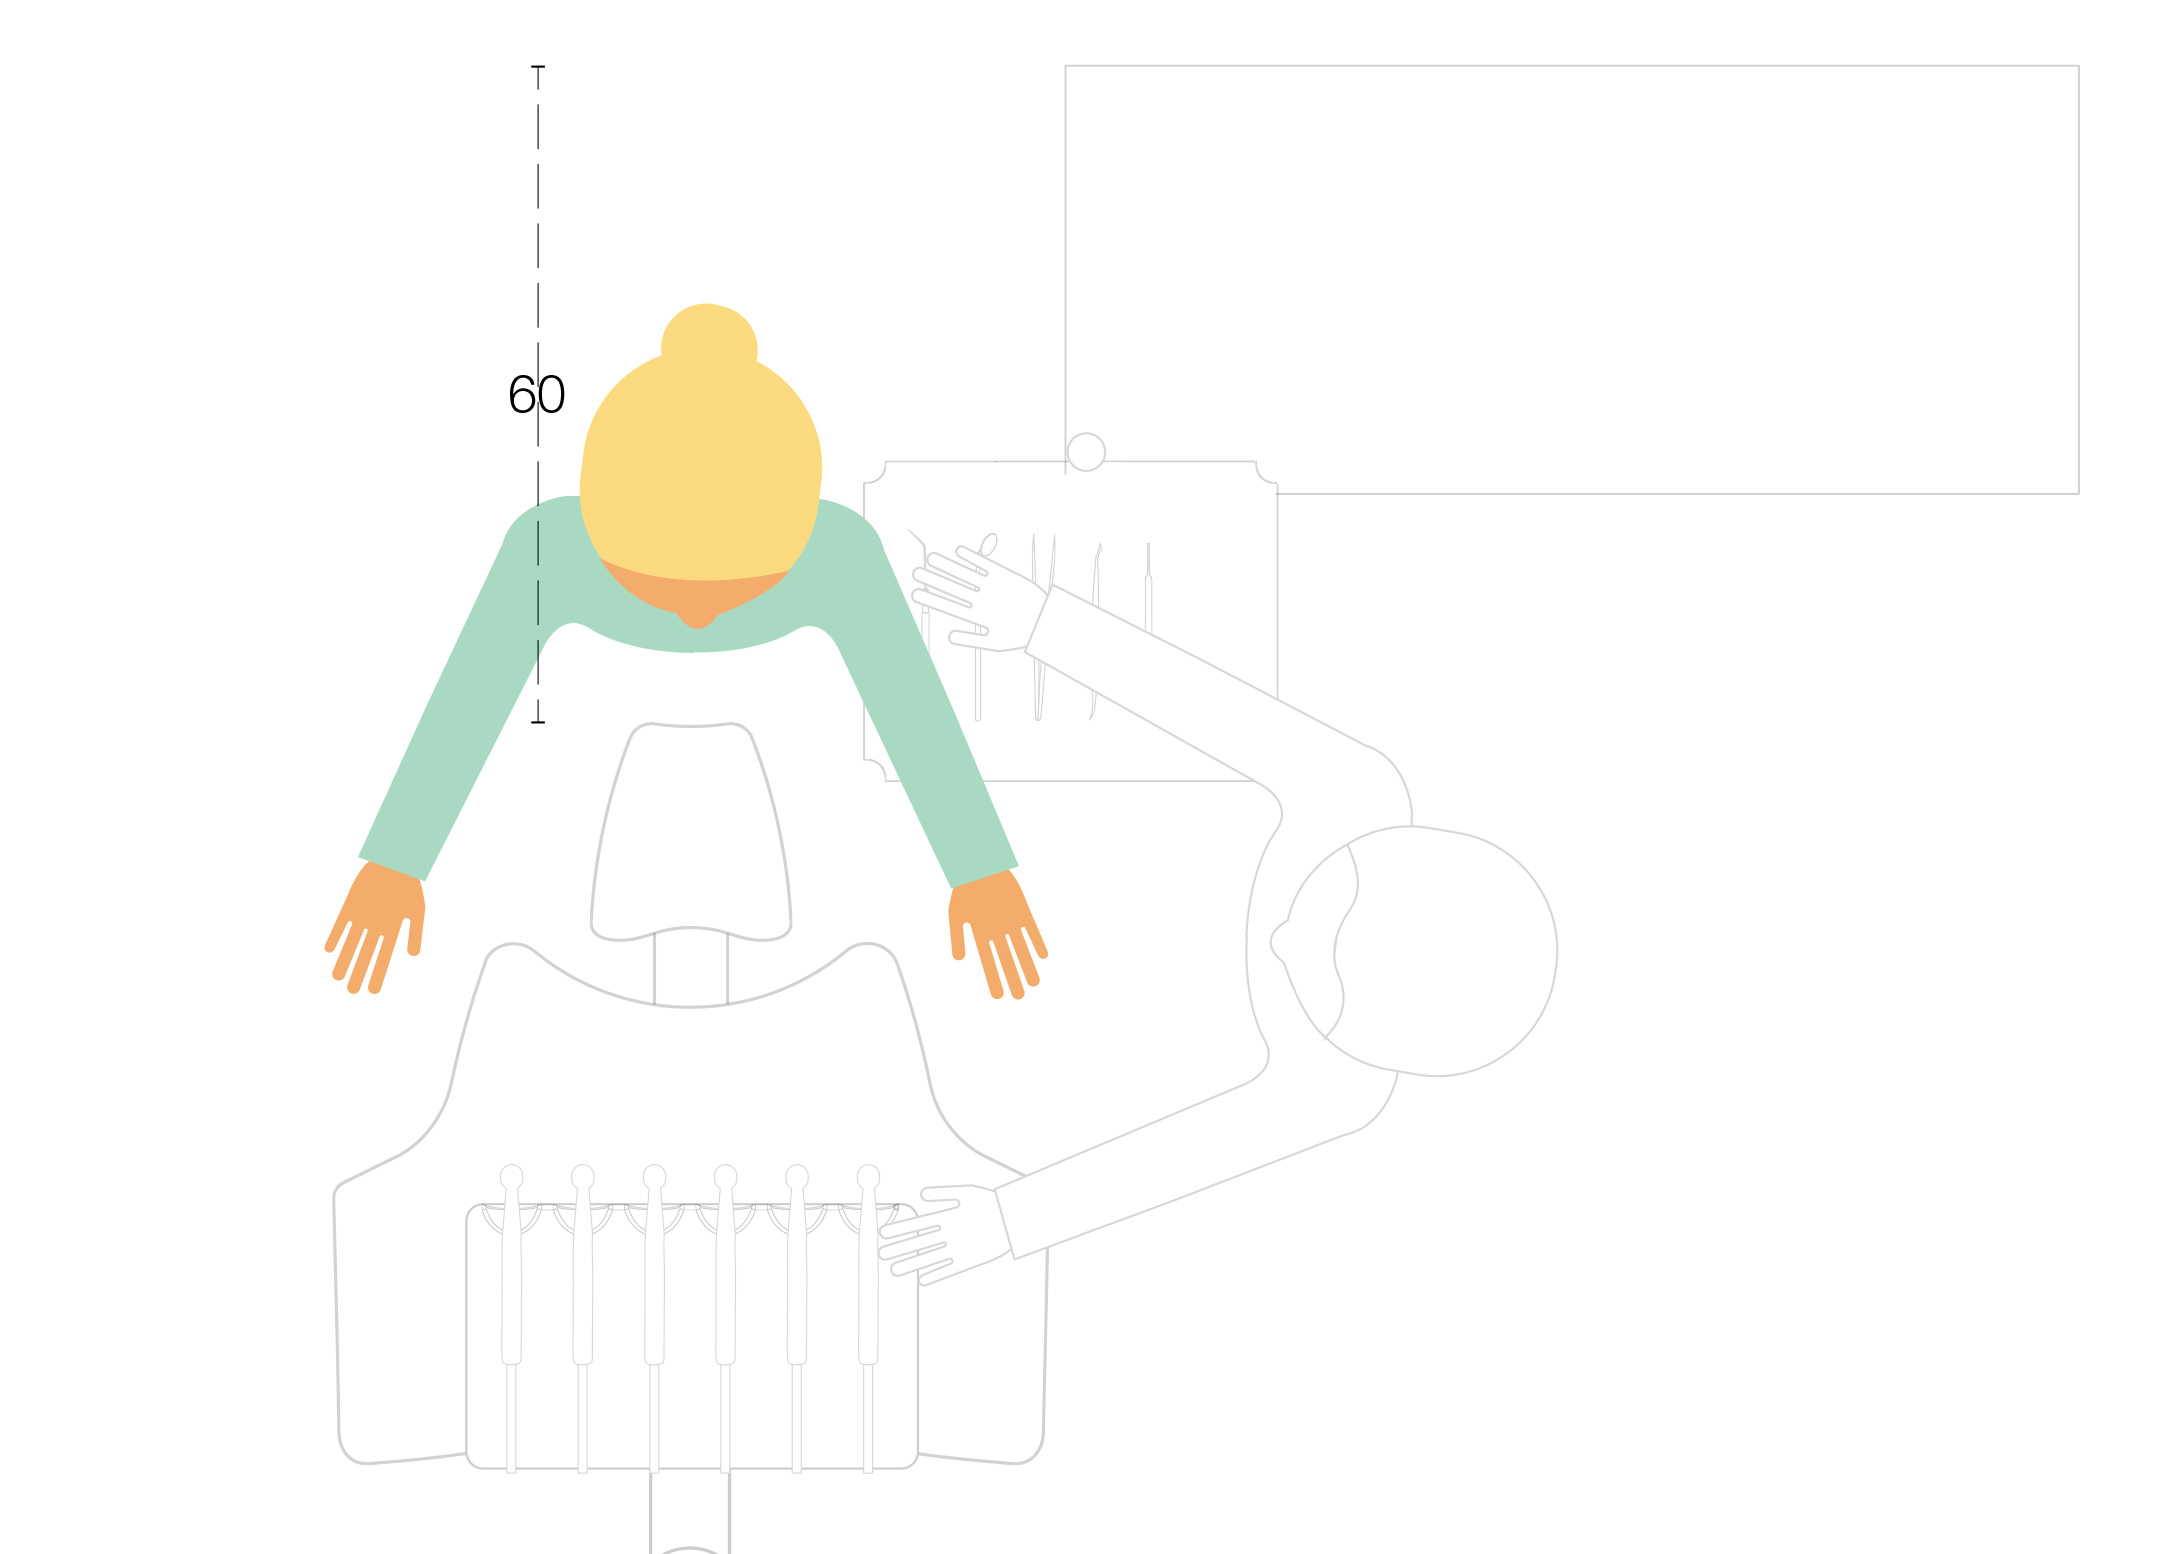
Finally, allow at least 60 cm of free space behind the patient chair’s neck in order to allow yourself to work well in the 12 o’clock position.
1The dimensions presented in this document are suitable for dentists, who are 170 - 185 cm tall and weigh 65 - 95 kg, sitting in the upright balanced position.
2All dimensions are in centimeters.
3Mandal, A. (1985). The seated man: Homo sedens (3rd rev. ed.). Klampenborg, Denmark: Dafnia Publications.
5Hokwerda, O., Wouters, J., De Ruijter, R., & Zijlstra-Shaw, S. (2007). Ergonomic requirements for dental equipment (2nd ed.). European Society of Dental Ergonomics.
XO CARE collaborates with advertisers, media agencies, and networks. The purpose of such cookies is generally to ensure the delivery of targeted online ads on behalf of our collaborative partners and Therefore, the following companies also place session or persistent cookies on our website: Google and Facebook. Privacy and cookie policy.